Use FenixEdu™ API in your application
In this tutorial, you will learn how to register your third-party application to use the FenixEdu™ API, and how to use one of the SDKs that we developed to ease the API invocation. Note that you can still use any HTTP client to invoke the endpoints on your own, or perhaps, contribute with a SDK of your favorite language.
Table of Contents
- Step 1 - Register your Application
- Step 2 - Invoke the REST API Endpoints
- Using Spring Security OAuth2
- Troubleshooting
Step 1 - Register your Application
The first thing you need to start using the FenixEdu™ API is to register your aplication within the system running the FenixEdu™ you wish to invoke. To do so, you must login into FenixEdu™ installation and select the menu Personal > Manage Applications. If such menu entry is not present, please contact support so you can get the DEVELOPER role.
To register your third-party application, you’ll need to provide some information about your application. To do this, you need to fill up the form shown in Figure 1.

- Logo - A 64x64 pixel-wide image that identifies your application.
- Application Name - The name of your application.
- Description - A short text about your application.
- Site URL - An optional website URL of your application.
- Scopes - The private information scopes that users must authorize to use your application.
- Redirect URL - - The endpoint in your application to proceed the OAuth2 flow.
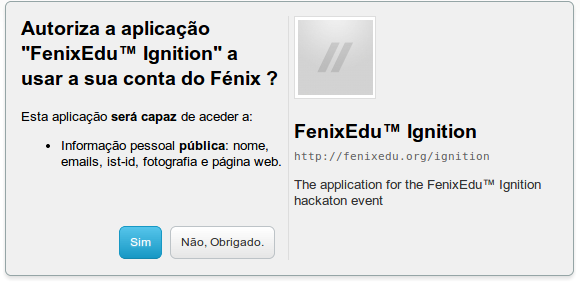
This information is used by us to identify your application and allow users to authorize their private data through the oAuth authorization protocol. When using your application for the first time, users will be prompt to authorized the requested scopes. The authorization form, exemplified in Figure 2, will display the information that you provided when your registered your application.
Step 2 - Invoke the REST API Endpoints
After you registered your application, two important tokens will be given to you:
- Client ID - Identifies your application.
- Client Secret - The private secret that will be used to sign all your application requests.
Step 2.1 - Use one of the official SDKs
In the case your application is developed in Java, PHP or Python, you can easily start invoking the FenixEdu™ API using the respective SDK. You can find out how to use them by reading the corresponding tutorial:
If you still wish to understand the overall flow, or in case you decided not to use one of the available SDKs, you should continue to read the tutorial and understand how to request the user’s permission, obtain access tokens, make API requests using such access tokens, or refresh them when they expire.
Step 2.2 - Request the User Permission
The first thing your application must do is to obtain authorization from a FenixEdu user. To do this, you application must redirect the user to the authorization form, like the one identified in Figure 2.
https://fenix.tecnico.ulisboa.pt/oauth/userdialog?client_id=<client_id>&redirect_uri=<redirect_uri>This page will prompt the user to authorize your application, so that FenixEdu™ can provide the information you requested when you created your application. If the user is not logged in, FenixEdu™ will ask him to login first before he can authorize your application.
Note Remember that both
client_idandredirect_uritokens are available in the details of your registered application.
It might be the case that the user refuses to authorize your application. When the user denies authorization to your application, he will be redirected to the following endpoint:
<redirect_uri>?error=access_denied&error_description=User didn't allow the applicationUnsurprisingly, you can’t continue the authorization workflow if the user refuses to authorize your application.
Note If your application is getting many authorization denials, you might be requesting scopes of information that the user finds irrelevant for your application needs, or he just don’t trust you. Eitherway, you should review the scopes requested by your application, or give a more detailed explanation to the user why you need such scopes of information before you request their authorization.
Step 2.3 - Request the Access Token
After the user authorizes your application, FenixEdu will invoke a GET HTTP request in the redirect URL that you specified when you registered your application. In such request, FenixEdu™ API will provide a code through a query param as exemplified:
<redirect_uri>?code=XXXXXXXXXXXThe obtained code must be used to obtain an access_token for that user. For that, you must invoke a POST HTTP request in the exemplified endpoint:
https://fenix.tecnico.ulisboa.pt/oauth/access_token?client_id=<client_id>&client_secret=<client_secret>&redirect_uri=<redirect_uri>&code=<code>&grant_type=authorization_codeIf everything is working as intended, an HTTP 200 Ok response with Content-Type: application/json should be returned with the following body:
{
  "access_token": "IGNhbiBjb252ZXJ0IHRleHRzW5nIHNldmVyYWwgY29kZSBwYWdlcpbmcgQ2hhclNl",
  "refresh_token": "dCBwcm9wZXJ0eSkgZnJvbSBVbmlIHN0cmluZyB0byBieXRlIGFycmZCB0aGVuIGNv",
  "expires_in": "3600"
}
Step 2.4 - Refresh the Access Token
In the interest of security, every issued access token is only valid for 1 hour. After this period of time, the access_token expires and the refresh_token must be used to issue a new one. The refresh_token never expires, unless:
- You change your application information.
- The user explicitly revokes the associated authorization.
- A FenixEdu™ API administrator either revokes the associated authorization or the application.
To get a new access_token, you must invoke a POST request to the following endpoint:
https://fenix.tecnico.ulisboa.pt/oauth/refresh_token?client_id=<client_id>&client_secret=<client_secret>&refresh_token=<refresh_token>&grant_type=refresh_token
If everything goes smoothly, you should receive an HTTP 200 Ok response with Content-Type: application/json as exemplified:
{"access_token":"IGNhbiBjb252ZXJ0IHRleHRzIHVIHNldmVym3r2cgQ2hhclNl", "expires_in":"3600"}
Using Spring Security OAuth2
If you are using Spring Security OAuth2 the configuration should be finetuned as below due to known limitations of Bennu OAuth2 implementation (BNN-230 BNN-231)
spring:
  oauth2:
    client:
      accessTokenUri: https://localhost:8080/oauth/access_token
      userAuthorizationUri: https://localhost:8080/oauth/userdialog
      clientId: <...>
      clientSecret: <...>
      clientAuthenticationScheme: form
      authenticationScheme: query
Troubleshooting
If something goes wrong while invoking the FenixEdu™ API, an HTTP 401 Unauthorized response with Content-Type: application/json will be returned:
{ "error": "...", "error_description": "..." }
Depending of your action, you can have different error codes that might help you identify your problem:
- Errors while Invoking the API:
invalidScope- Application doesn’t have permissions to access the invoked endpoint.accessTokenInvalid- The access token used doesn’t match the one in the server.accessTokenExpired- The access token has expired. The refresh token must be used to get a new one.accessTokenInvalidFormat- The access token used was not recognized.
- Errors while Refreshing the Access Token:
invalid_grant- Credentials orredirect_uridon’t match.refreshTokenInvalid- Refresh token doesn’t match.refreshTokenInvalidFormat- Refresh Token not recognized.